Did you know you can easily transform your WordPress website into a fully functioning online store? WooCommerce, an e-commerce plugin for WordPress, helps with this transformation.
If you are a seller looking to set up a WooCommerce store from scratch or want to convert your WordPress website into an e-commerce store, you have come to the right place. The article here will cover everything from setting up WooCommerce to customizing your store.
More on ‘WooCommerce’
With over 5 million downloads, many consider WooCommerce the best eCommerce plugin. While WooCommerce is decorated with several accomplishments, its seamless integration with WordPress stands out the most. The integration allows you to evolve by exposing you to its global community.

Here’s why WooCommerce is the right choice for your business:
A. Scalability:
With a rich plugin library, WooCommerce allows the user to expand its functionality as the business grows.
B. Affordability:
WooCommerce is available for free. This means no subscription fees or paying for the license.
C. Security:
WooCommerce ensures secure transactions via different payment methods, all thanks to tokenization.
D. Plugins:
Plugins are add-ons that extend the functionality of a WooCommerce store. They offer a wide range of features, from payment gateways to shipping methods, marketing tools, and more.
E. Support from the community:
WooCommerce offers detailed store setup and troubleshooting guides, along with email support from their team.
With all the above reasons running your business with WooCommerce is fairly easy. However, if you’re just a beginner, starting your store on eCommerce can be a little tricky. Here is your step-by-step guide that covers everything you need to know about installing the WooCommerce plugin and effectively managing its extensions.
How to set up your WooCommerce store?
Pick a niche.
Choosing a niche for setting up a WooCommerce store is important for several reasons:
First, it helps you define your brand and stand out in a crowded market. By focusing on a specific industry or product line, you can differentiate yourself from competitors and establish yourself as an expert.
Second, narrowing your niche can help you better understand your target audience and their needs. This allows you to tailor your marketing and product offerings to meet their specific demands, increasing customer satisfaction and loyalty.
Finally, choosing a niche can also simplify your operations and make it easier to manage your store. Focusing on a specific product line can streamline your inventory, shipping, and customer support processes, increasing efficiency and profitability.
Purchase a domain name and SSL certificate.
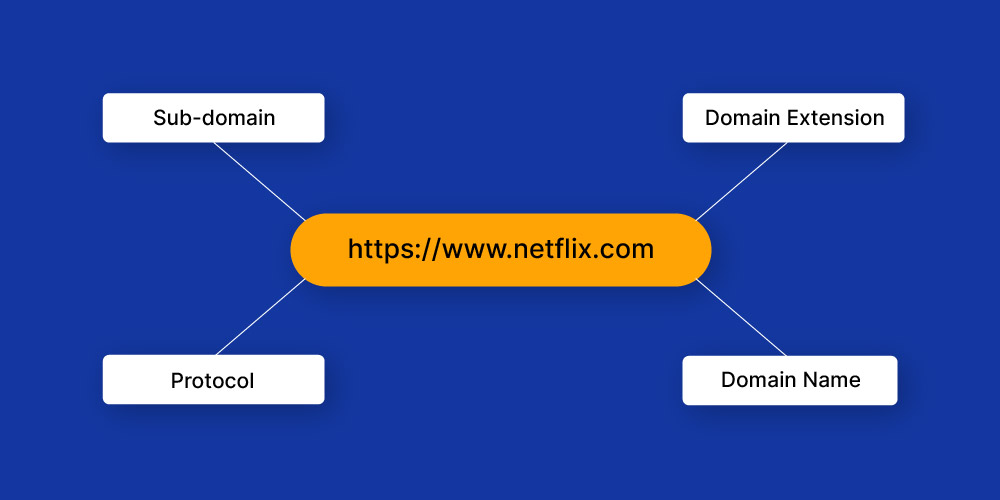
First, you need a domain name for your WordPress website.
But, what is a domain name? A domain name is a unique, easy-to-remember address for any website. For example- ‘Netflix.com’ or ‘Google.com.’
Here are five 5 most common domain extensions:
- .com – most used and well-known domain extension for any business.
- .net- appropriate for IT or web-based businesses as it comes from the word “network”.
- .org- widely used by non-governmental organizations or educational websites, but not advised for use in commercial settings.
- .co- younger generations-friendly, shorter, and more modern alternative to.com.
- .us- reserved for American citizens and organizations.
Source: GoDaddy.
Here are a few tips while choosing a domain name:
- Create simple domain names that are easier to remember for your users.
- Keep the ideal character length for domain names between 6-14.
- Make sure that the domain name isn’t too short or too long.
- A domain name with an exact word length is considered ideal.
- Incorporate SEO keywords while creating your domain name to improve your visibility in search results.
- Use relevant keywords to increase traffic to your online store and ensure recognition. .
- Aim for an SEO-friendly domain name that resonates with your target audience.
- You can check the SEO-friendliness of your domain name using platforms such as GoDaddy.
SSL Certifications:
You can purchase an SSL certificate to safeguard your website’s sensitive data from unauthorized access. In simpler terms, the SSL certificate adds that extra ‘s’ to your website URL, i.e. HTTPS. This helps encrypt data and secure your website.
Having an SSL certificate provides data encryption and improves search engine rankings, as Google prefers to rank websites with SSL certificates and marks those without as ‘Not Secure.’
In addition, customers prefer websites with HTTPS in their URL for online activities such as shopping, reading, and watching.
Buying an SSL certificate from Domain.com or getting a free one from platforms like Bluehost, Dreamhost, HostGator, and WP Engine offers options. This will protect your website data and save you money which you can invest to purchase other helpful WooCommerce extensions.
Get a hosting service and set up WordPress:
To use WooCommerce, you must first create a hosting account to store your website files. Factors such as uptime, speed, customer support, security, and business size should be considered when purchasing a hosting plan.
Several hosting companies are available, including WP Engine, Bluehost, Kinsta, Hostgator, DreamHost, and InMotion.
To learn more on ‘How to choose your hosting service provider?’ and ‘How to launch your first WordPress website?’ click here.
Install and activate WooCommerce.
Once you are done with downloading and installing WordPress, the next step is to download WooCommerce. There are three ways to do so:
1. Create an account on WooCommerce.com
2. Go to WordPress.org and download WooCommerce.
3. Type ‘WooCommerce’ on the WordPress search bar and install the plugin.
WooCommerce Setup wizard:
Once you’ve completed the installation process, the WooCommerce setup wizard becomes accessible and allows you to customize your eCommerce store, enhancing the overall user experience. This setup wizard guides you through configuring your WooCommerce store.
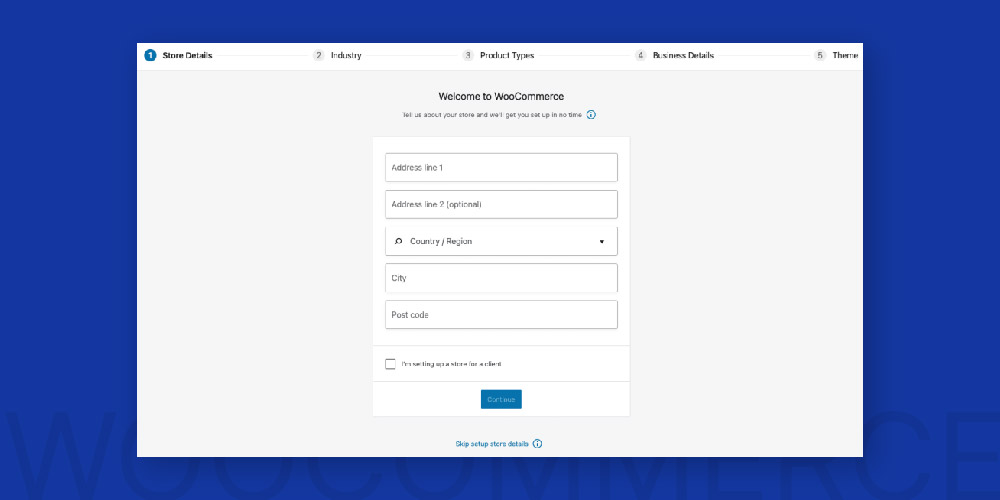
Next, fill in the following details:
A. Store details: Provide the basic details – country, address, postcode, city, and email address.
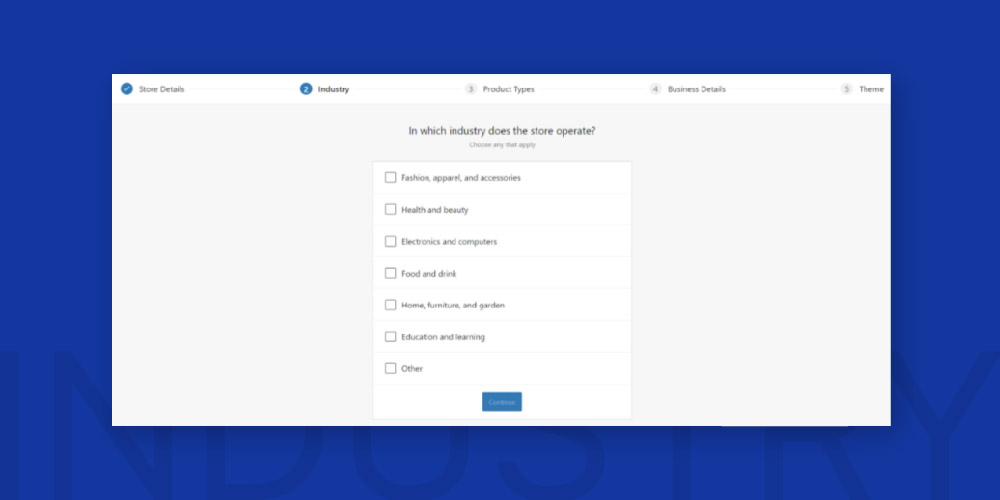
B. Industry: Mention at least one industry in which your WooCommerce store falls.
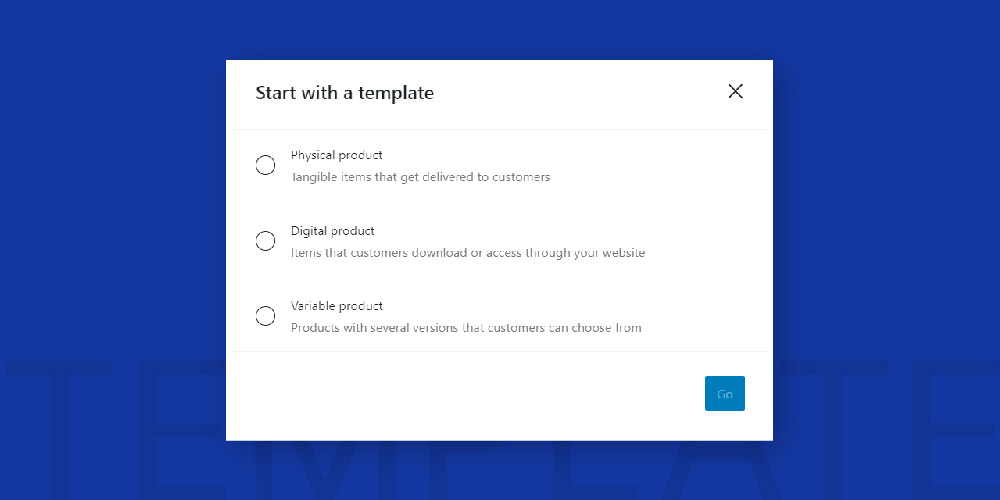
C. Product type section: Mention the type of your products: Physical, digital or variable.
D. Other Details: Number of products and whether you sell on other platforms.
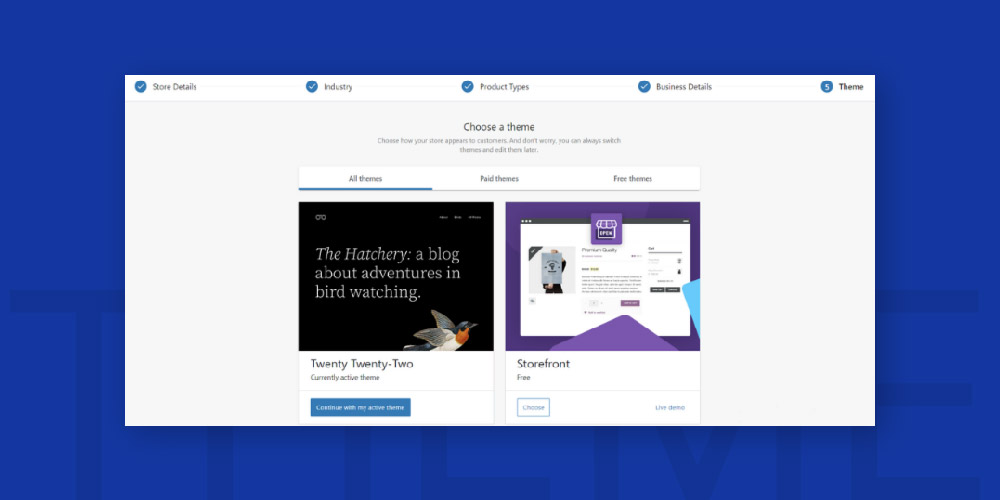
The last step is to choose a template for your WooCommerce store. You can change this template later on as well.
Once all steps are covered, you will be redirected to the WooCommerce dashboard.
Add products.
Before jumping onto the product creation process, here are a few terms you should know:
- Product Categories: Product categories consist of products with similar features grouped together. . For instance, the apparel category consists of tops, bottoms, and sports gear. Grouping related items together helps shoppers to find similar products conveniently.
- Attributes: By filtering the products based on size, color, fabric, and other attributes, customers can easily find and select their desired items. You can assign attributes to individual products or set up a general attribute for the entire website.
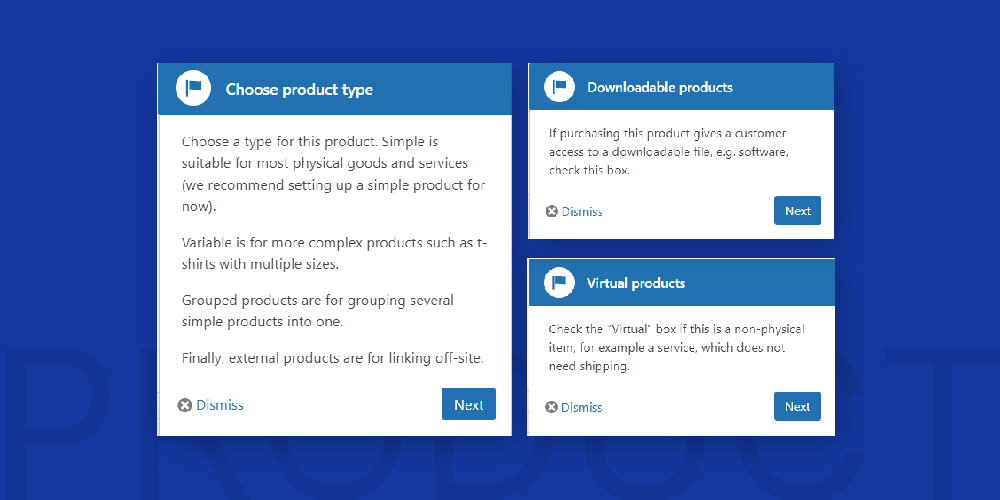
- Product Types: WooCommerce has different types of products:
- Simple: One stand-alone product sold without any other variations. For example- books.
- Variable: Products with different variations, such as sizes and colors, are variable. Shoes and clothes are good examples of variable products.
- Grouped: Similar products grouped under a single category, such as a dozen glasses.
- Digital: Products that don’t require shipping, Software, and services are the best examples of digital products.
- Downloadable: Digital products refer to items that can be downloaded, such as songs, images, videos, and eBooks.
- External: These products are promoted on your WordPress website but are available for purchase elsewhere.
Steps to Add Products:
Adding new products to your eCommerce store is similar to creating a new blog post and can be done via the WordPress dashboard. Here are the steps to add WooCommerce products:
Step 1: Navigate to the “Products” option on the left-hand side of the navigation bar and select “Create Product” to add new products to your WooCommerce store. Alternatively, you can import products by uploading a CSV file.
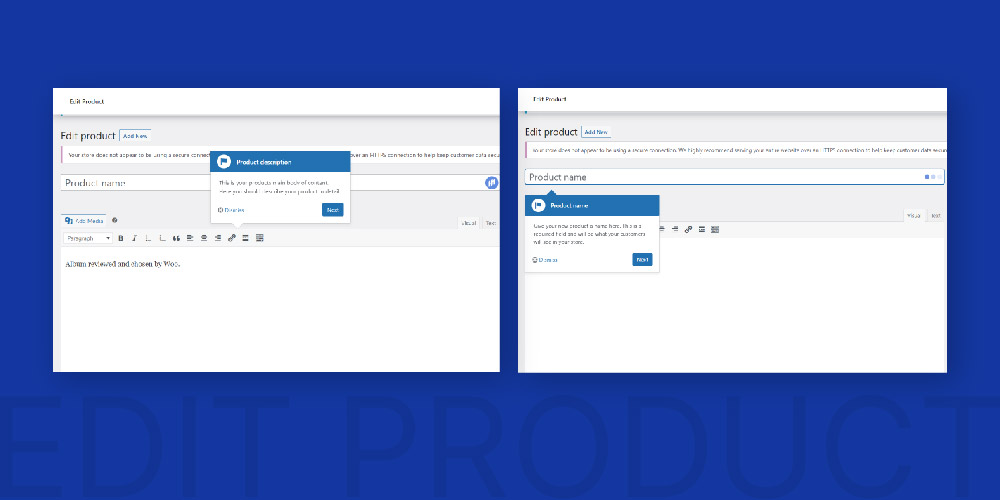
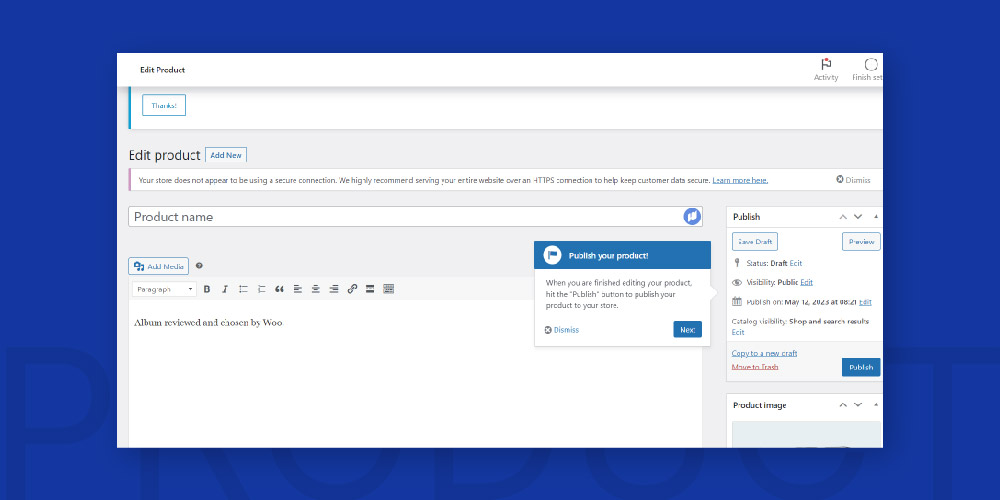
Step 2: Enter the product name and description.
Step 3: Head to the product section and mention the ‘Type Of Product’:
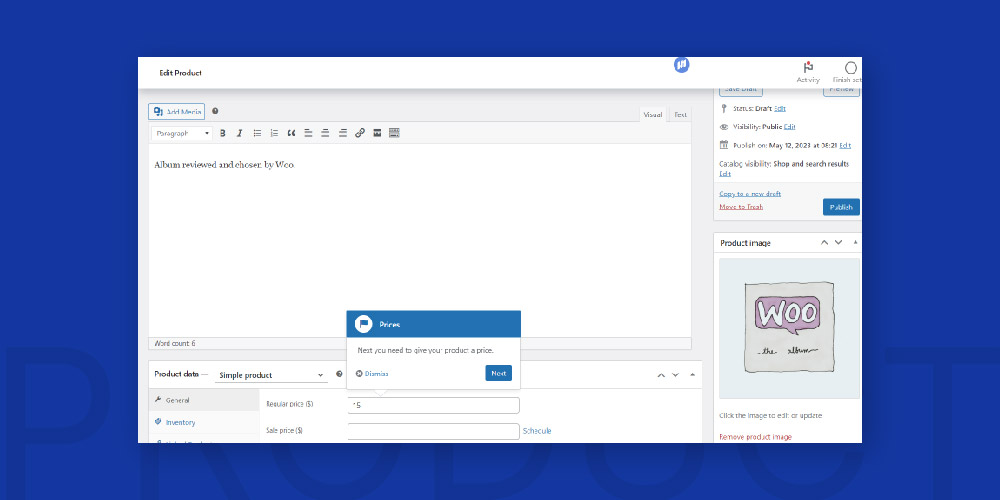
Step 4: Choose the price for your product.
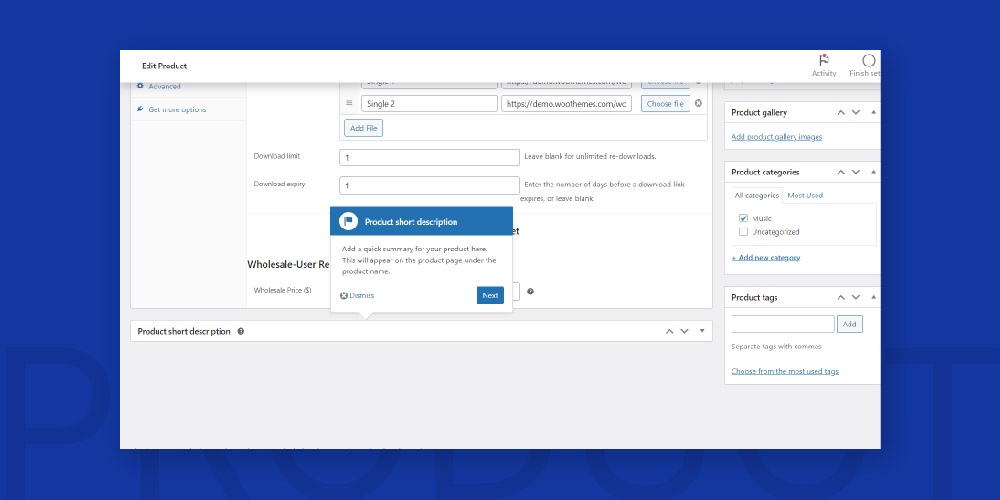
Step 5: Add a short description of your product.
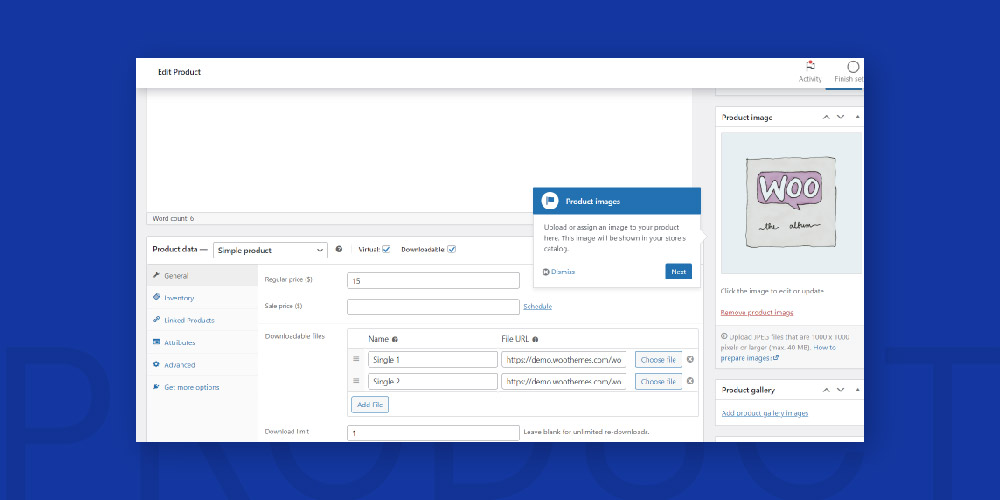
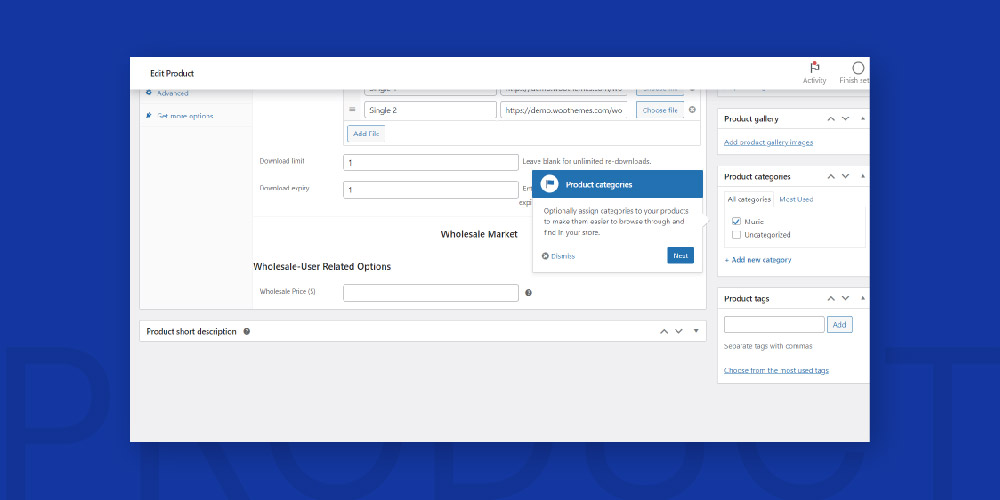
Step 6: Choose your product’s feature image. The maximum file size is 1 MB. If you want to upload multiple images, upload them from the product gallery.
Step 7: Label your product with the help of a Product Tag, making it easier for the customers to find it.

Step 8: Set your product’s category. Make sure that you have added the right category. In case there is no appropriate category available, click and create it by clicking on Add New Category.
Step 9: Finally, click to publish your product.
You can choose whether your product is public, password-protected, or private in the Publish area. Click Save Draft and check the product Preview. If you’re satisfied with the preview, go ahead and click Publish.
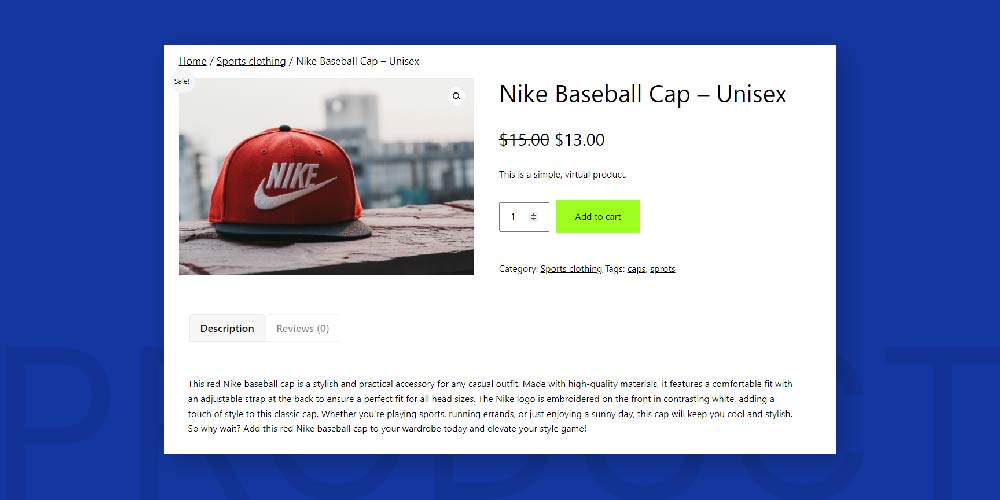
Here is an example of a live product:
How to manage products?
As your business grows, a large number of products can be managed via WooCommerce Inventory Management.
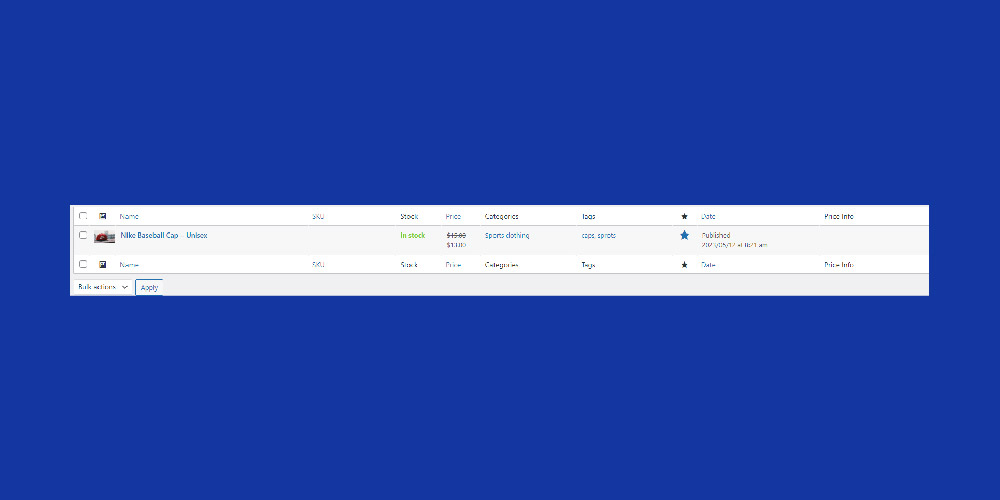
Under the Products tab, you can:
- Duplicate a product: This option is helpful if you have similar goods to sell. You can easily create duplicate products and edit the draft by clicking on the Duplicate button.
- Delete a product: You can click on the trash icon that appears when you hover your cursor over the product name.
- Featured product: To highlight a product, click the Star icon. This enables you to highlight your top-selling item on the homepage or use shortcodes to add it to posts.
Set payment methods.
Follow these steps to add payment methods to your store:
1. From WooCommerce → Set up payments, and Get Started.
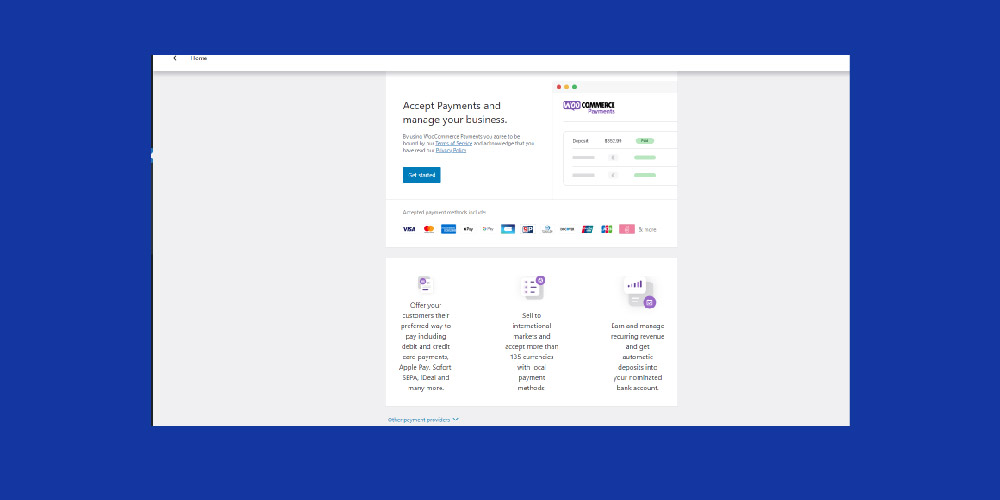
2. Click the Get Started button next to the PayPal Payments option in WooCommerce. WordPress will install the WooCommerce PayPal Payments plugin.
3. After setting up your PayPal account, select PayPal Activate.
4. To link PayPal to your WooCommerce store, provide your login information.
5. Return to Create payments. Then, enable Direct bank transfer and Cash on delivery. Give your bank information, including account name, account number, bank name, and sort code, for the latter.
Note: Visit the WooCommerce Extensions Store to add more options. It provides over 80 payment processors and solutions, including Square, Amazon Pay, and Stripe.
Add shipping details.
Setting up shipping zones is the next step if you sell tangible goods. This lets you base shipping charges on particular geographic regions:
1. Go to Shipping under Settings in WooCommerce.
2. Choose Add Shipping Zone.
3. Type in the zone’s name, select the region, and add shipping options.
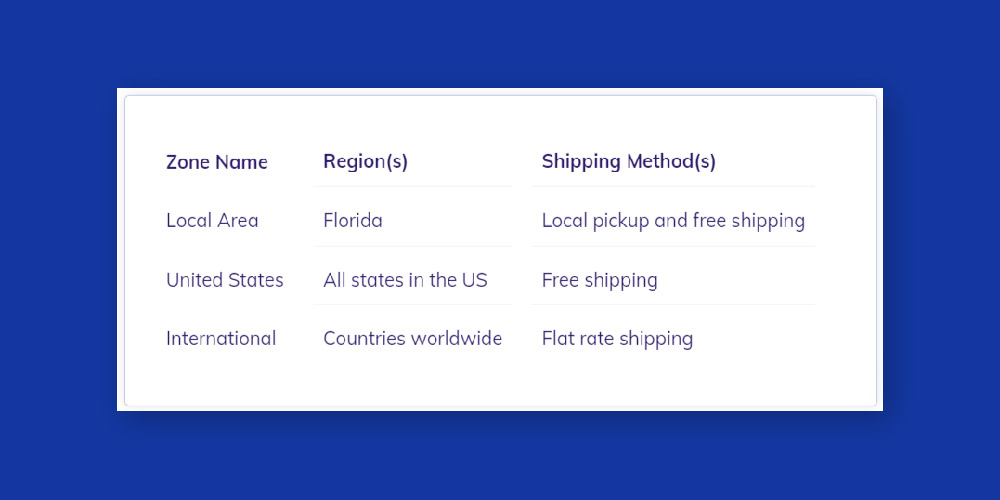
Configure the shipping options following that. You can choose the default shipping address, show the shipping calculator on the cart page, and hide shipping costs until users enter their addresses.
Additionally, WooCommerce’s Shipping classes functionality enables you to group related products.
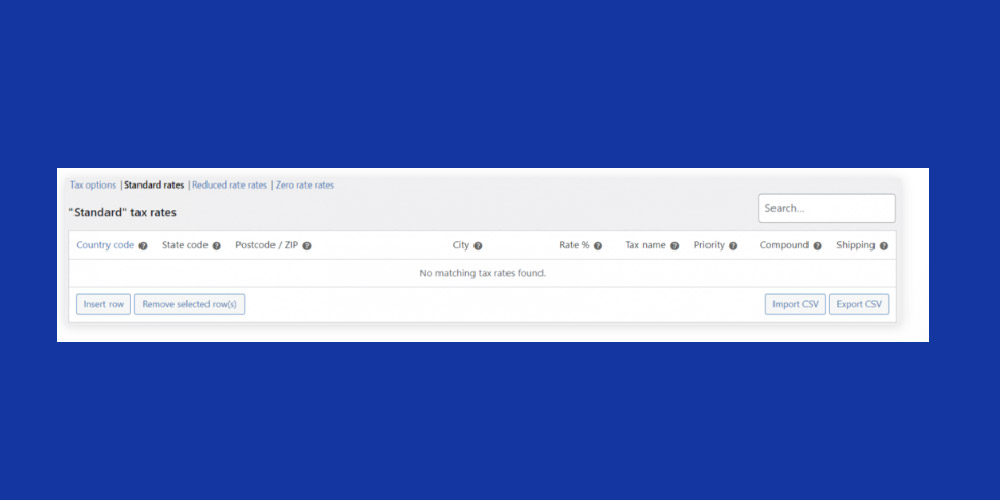
Set up Tax:
To help you with the daunting tax calculations, WooCommerce allows you to include taxes automatically during checkout:
A. From WooCommerce → Settings → General.
B. Click on Enable tax rates and calculation box.
C. Save Changes.
D. Once the automation is enabled, a tax tab will appear. Configure the settings in the tab:
- Enter Prices with tax: Here, you can decide whether the product prices are included or excluded from the taxes.
- Calculate tax based on: Choose the shipping address for the consumer, the billing address, or the location of your business for tax calculation purposes.
- Display price in the shop: This impacts how shoppers see the prices while browsing the store. Customers can experience issues if these settings don’t match the first choice.
- Insert tax rate: Here are the tax rates for various regions, including standard, reduced, and zero.
Customize your store.
You must consider two things while customizing your store:
A. WooCommerce themes- To give a unique look and feel to your online store.
B. WooCommerce extensions- To add to the functionality of your store.
Many of these themes and extensions are available free on the WordPress dashboard or WooCommerce extension store.
Themes:
To install a theme on your store, go on the WordPress admin → Appearances → Themes, and click on the Add New button.
Here are some of the most widely used eCommerce WordPress themes:
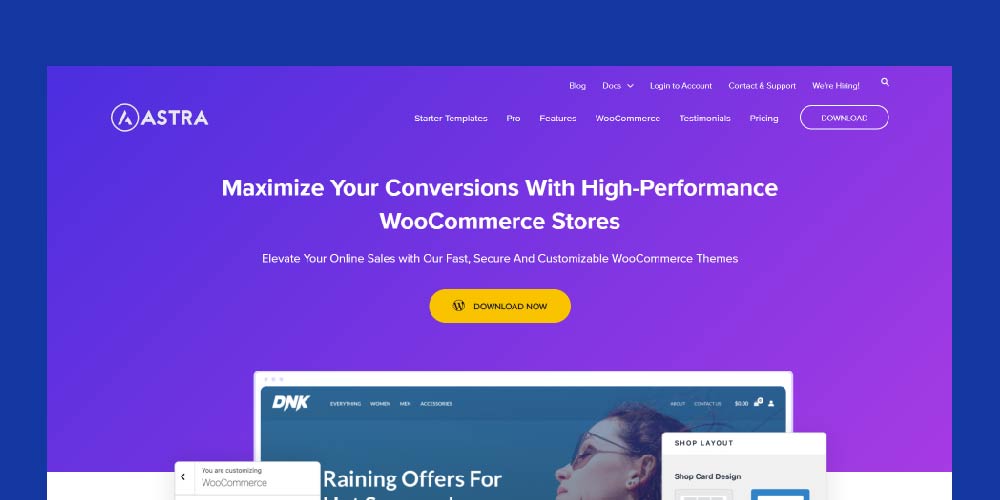
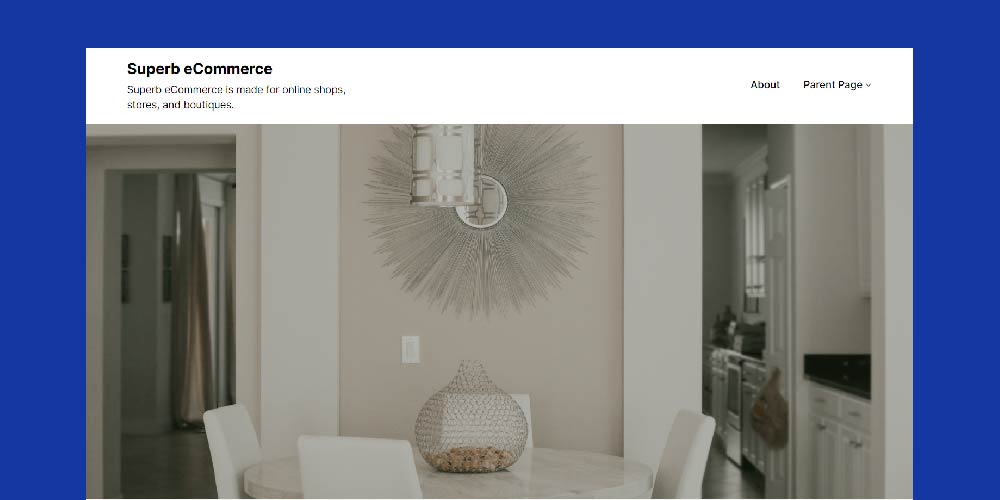
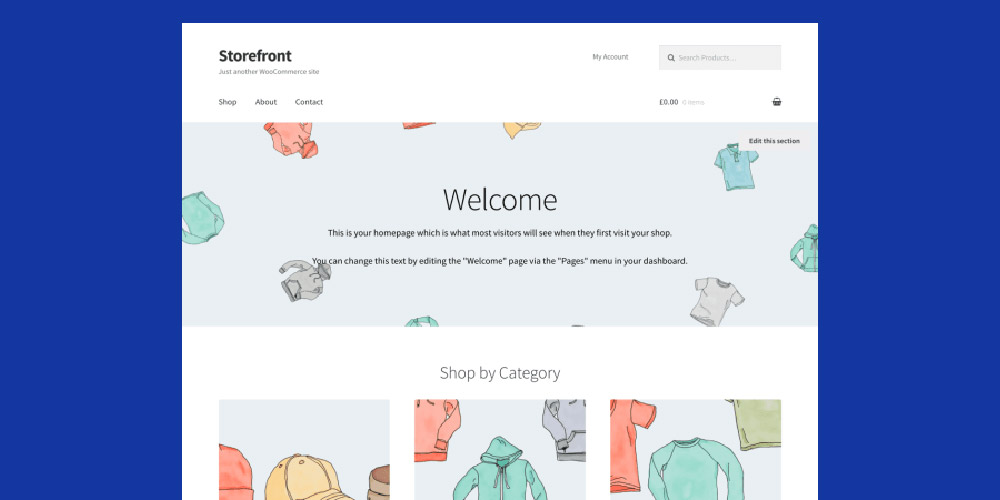


Here are the experts picks for the most widely used WordPress themes.
Plugins and extensions:
To install additional plugins, simply go to Plugins → Add New, and install the extension.
Here is a list of suggested plugins and extensions for WooCommerce:
- Stripe for WooCommerce: The Stripe Payment Gateway, a PayPal substitute, might be a better choice for some WooCommerce customers. It integrates with your website and doesn’t direct customers to another page for payment. American Express, Apple Pay, MasterCard, Visa, and Google Pay are all supported by this plugin.
- WooCommerce Multilingual: Translate the product details, checkout page, and contact form on your WordPress website into different languages.
- WooCommerce Menu Cart: A floating shopping cart can be shown using this tool. Customers don’t have to go to a different page to check the products in their cart.
- YITH WooCommerce Wishlist: This plugin allows Users to make wishlists on the eCommerce site and share them on social networking sites.
- Husky Product Filter: This WordPress plugin sorts WooCommerce items according to different standards, including cost, size, and category.
- FraudLabs Pro: This plugin filters every transaction and guards against fraud orders for your WooCommerce store. Geolocation, proxy, email, blacklist, credit card, and transaction velocity are just some of the validated order components. Additionally, the plugin creates thorough reports for the merchant area.
Scroll through and choose other plugins for your store here.
Manage your store.
Let’s learn how to manage orders, coupons, customers, analytics, system status, and extensions now that your WooCommerce store is ready.
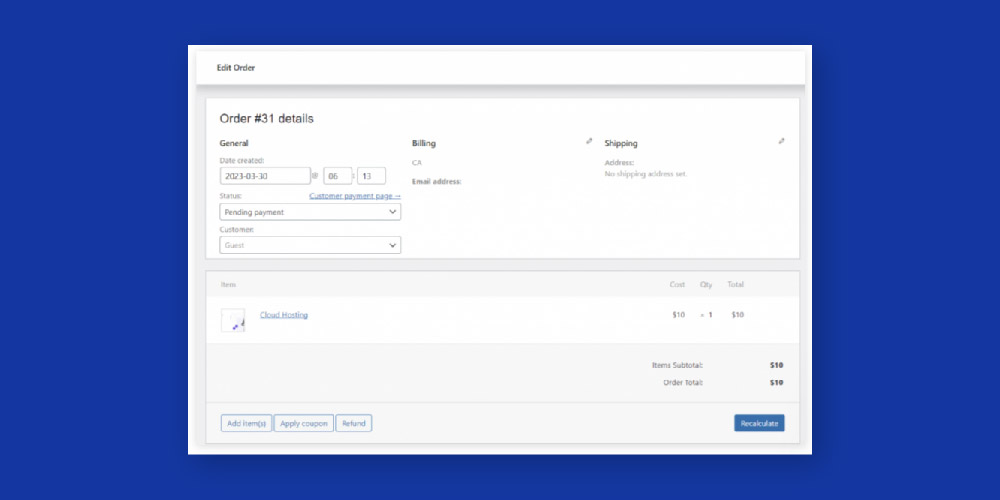
Orders:
WooCommerce will immediately start a new order whenever someone places an order. Navigate to WooCommerce Orders to get to them. Each order has a special ID, a payment due date, an order status, and an overall cost.
Click the order name to change the order details, apply a coupon, issue refunds, or alter the order status. The creation date, billing address, shipping address, and customer email address are all included in the order details.
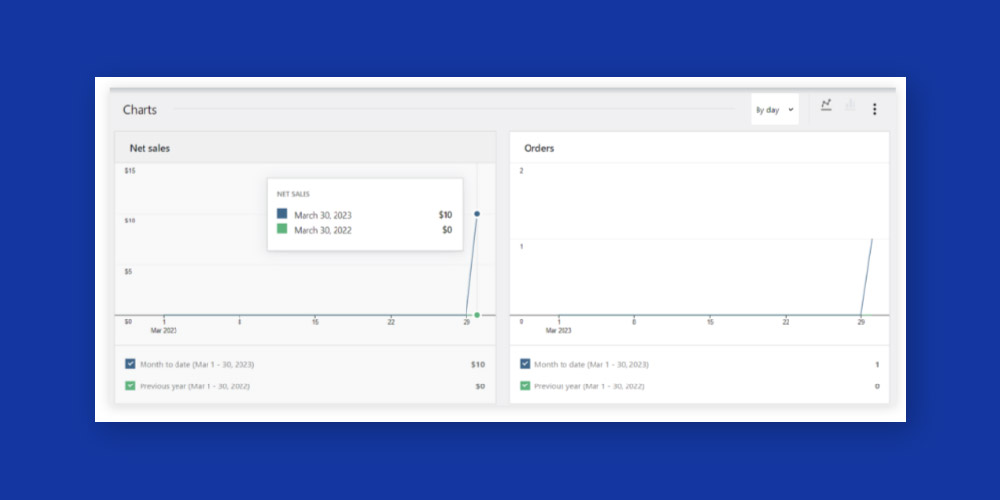
Store Analytics:
Growing a successful online store requires understanding the product categories that the buyers choose. Analytics area helps you see the most popular goods and categories.
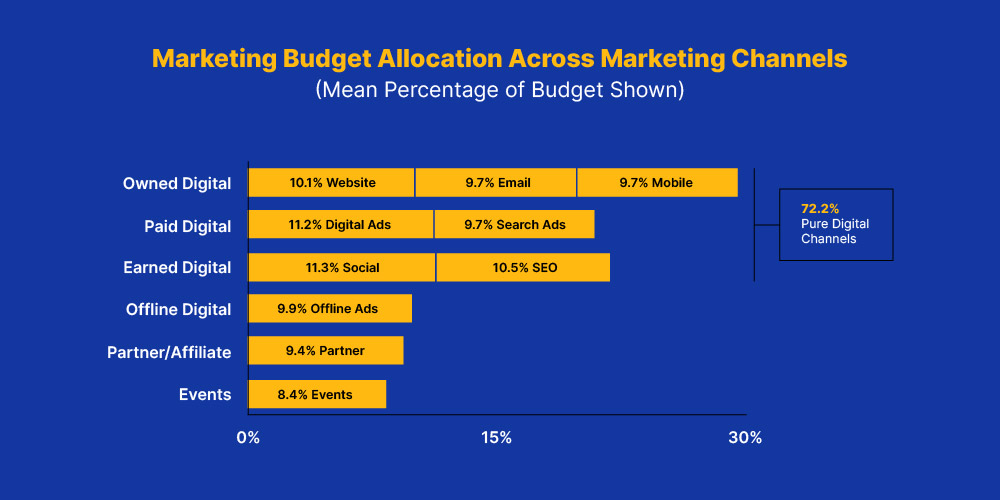
Promote and market your business.
While your WooCommerce store setup is now complete, you still need to market it on different channels.

But before you choose any platform for marketing your WooCommerce products, here are a few steps:
A. Define your target audience.
B. Research platform demographics.
C. Set marketing goals.
D. Consider platform suitability.
E. Evaluate budget and resources.
F. Analyze the competition.
G. Test and monitor.
Looking for a partner to plan your WooCommerce project? Feel free to drop your request at wpexcelsupport@cedcommerce.com
My brother recommended I might like this blog. He was entirely right. This post actually made my day. You can not imagine just how much time I had spent for this info! Thanks!
Hi there,
So glad that you found the article useful. Keep visiting us for more such informative and detailed blogs.